Alberton Gorge
Paddling guide to the Alberton Gorge on the Clark Fork River. Waiting for the FarOut version? Join the interest list below.
Alberton Gorge – Montana
Alberton Gorge Paddling Guide
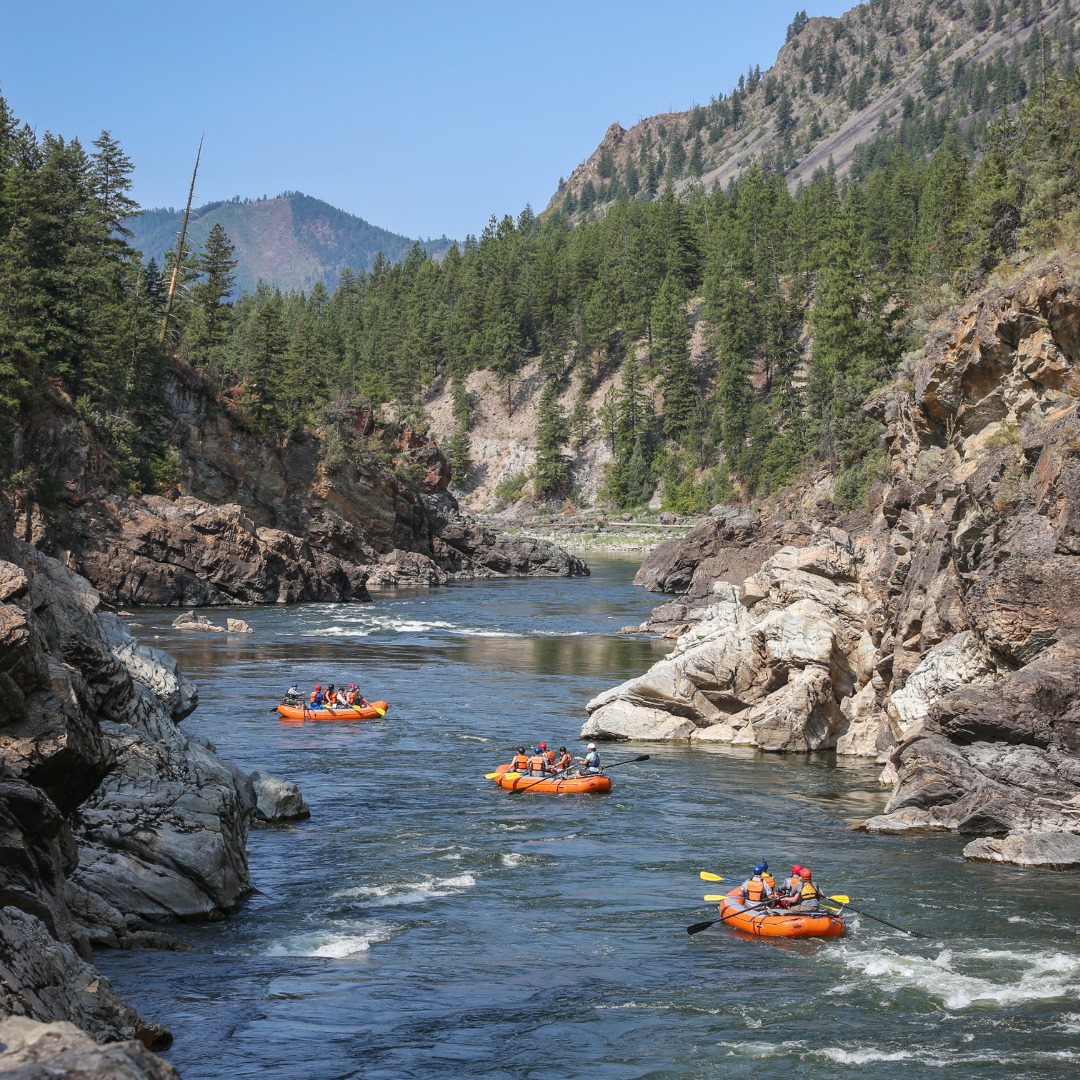
The Alberton Gorge of the Clark Fork River provides exceptional whitewater rafting through a deep canyon with striking cliffs and forests. Its rapids, ranging from powerful spring flows to technical Class III runs, offer thrills for all levels. The gorge’s geological history, shaped by the Missoula Floods and ancient Belt Supergroup rocks, reveals features like ripple marks and mudcracks. The diverse landscape, including sandy beaches and calm pools, makes it perfect for both adventure and family fun. The gorge’s stunning beauty and dynamic rapids solidify its reputation as a premier Montana whitewater destination.

Since 2004, Zoo Town Surfers has been running high-quality Alberton Gorge river rafting trips. In addition to the Alberton Gorge, they offer Lochsa, Black Foot, and Clark Fork rafting trips. Learn more about Zoo Town Surfers here.
4.8★★★★★ 25K+ Reviews
Paddling Alberton Gorge? Our paddling guide is coming soon! Join the interest list below.
Alberton Gorge – Rest Stop Put In to Forest Grove Takeout
Alberton Gorge is well-known in Montana as one of the premier rafting trips. It features incredible scenery, great wildlife, and awesome whitewater. Additionally, it is located less than an hour from Missoula.
Mile 0.0 – Rest Stop Put In
River Right. Some folks choose to put in at rest stop rather than Cyr to avoid the traffic and back their trailers to the water. Is it really only used at lower flows when Rest Stop Rapid becomes less of a hazard. Be aware that this will add an hour or two to your float depending on flows.
Mile 0.1 – Rest Stop Rapid
Class II – IV. Rest stop rapid is a mellow, read and run class II with large sandy beaches for much of the year. At high water however, this constriction rapid forms a massive wave. There are stories of a 28′ J Rig flipping here at high water. Confident class IV big water skills and self rescue are a must for attempting this rapid at higher flows.
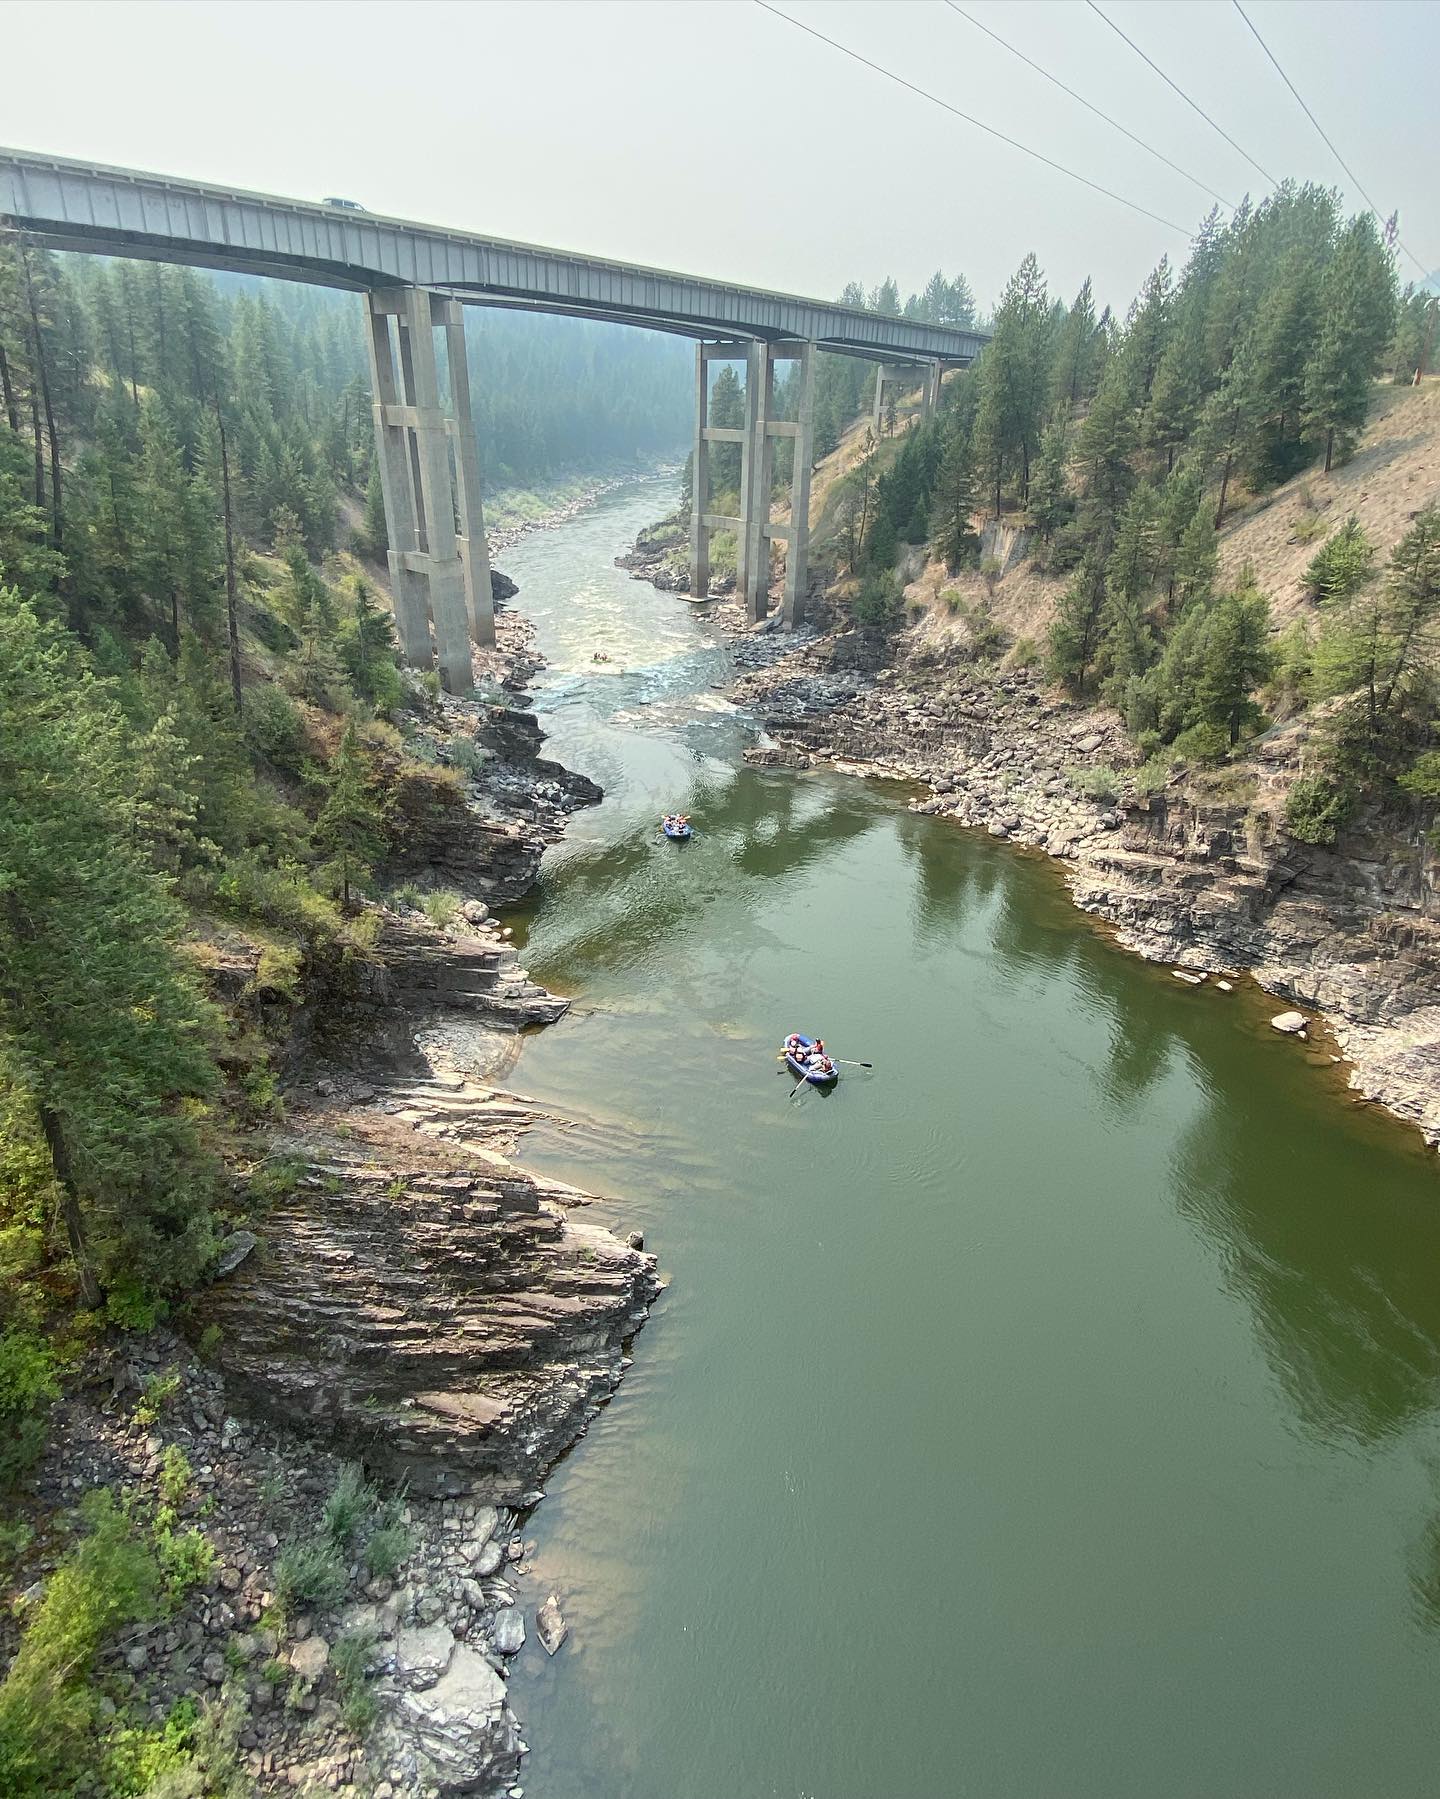
Mile 2.2 – highway 90 Bridge
Highway 90 passes over the Clark Fork Here. Cyr Bridge lies just downstream, there is another take-out option on the left-hand side below this bridge.
Mile 2.3 – Cyr Bridge Put in
River Left. This is the main put in for the Alberton Gorge. There is a steep ramp heading down to the river from the Cyr Bridge Parking Lot. This is heavily trafficked in the Summer. Please do not get your boat geared on the ramp! Moving quickly and efficiently here will keep the locals happy and prevent a traffic jam. Heavy boats are not recommended, as there is a rocky carry to the river once at the bottom of the ramp.
Mile 2.4 – Historic Cyr Bridge
Highway 90 passes over the Clark Fork Here. Cyr Bridge lies just downstream, there is another take-out option on the left-hand side below this bridge.
Mile 2.7 – Warm Up Rapid
Class II. The first rapid of the Alberton Gorge, warm up is very straight forward. At lower water, heading down the middle will have you scraping rock and the ride might feel a bit chunky, just right of center is preferred.
Mile 3.6 – Swimmers Rapid
Class II. A small rapid that has numerous rocks to avoid at low water.
Mile 4.4 – Unnamed Riffle
Class II. This riffle marks the start of the larger rapids, with The Shelf just downstream.
Mile 4.5 – The SHELF (Ledges)
Class III. Also known as The Ledge or Ledges, at lower water, there are two lines. The main line is to stay right and drive back center to run the short drop, moving back towards the right after the drop to avoid hitting the rocks on the shore. Some folks opt to hug hard right for the entire rapid, skipping the drop and waves. At higher water, this becomes one rapid with Cliffside 1, creating a chaotic set of waves.
Mile 4.6 – Cliffside 1
Fun, splashy rapid immediately after The Shelf. At higher flows, fun, chaotic waves can be found left of center, while at low flows, the line is to follow the main current right and drop in to the v.
Mile 5.0 – Cliffside 2
Class III. The waves here get bigger as the water levels drop. Great surf wave for kayakers to stop at, and it is not uncommon to see surfers that have walked town to the river. Star right of center, square up to the big waves, and be sure to pay attention at the bottom to avoid getting stuck on the many rocks that come out as the water levels drop.
Mile 6.3 – Sandy Beaches
River Left. Aptly named, this is a large sandy beach. While it is a great stop, it is usually heavily trafficked due to easy road access and a short trail. This also serves as a popular kayak put in.
Mile 6.3 – Purple Cliffs
River Right. The purple cliffs are a gorgeous formation of metamorphosed mudstone and hematite. Impossible to miss.
Mile 6.6 – Train and car bridge
Train and car bridge pass overhead.
Mile 6.7 – Triple Bridges
Class III. An incredibly popular surf spot for kayakers and surfers due to easy trail access, this is a fun rapid with big splashy waves. Starting river left and moving center, while wave zero is usually populated with some form of surfer or other, it is a great wave on a hot summer day.
Mile 6.7 – Highway 90 Bridges
As you pass through Triple Bridges Rapid you’ll move under Highway 90 bridges.
Mile 7.1 – Split Rock
Class II. A large rock splits the river in half. Either side of the rock goes, but the usual line is river right to hit the fun wave. Another great surf spot at lower flows.
Mile 7.2 – Ice Box
Class II. This is the entrance to tumbleweed rapid, Icebox being a fun wave on river left. If you opt to scout tumbleweed, pull over immediately after this wave on river left.
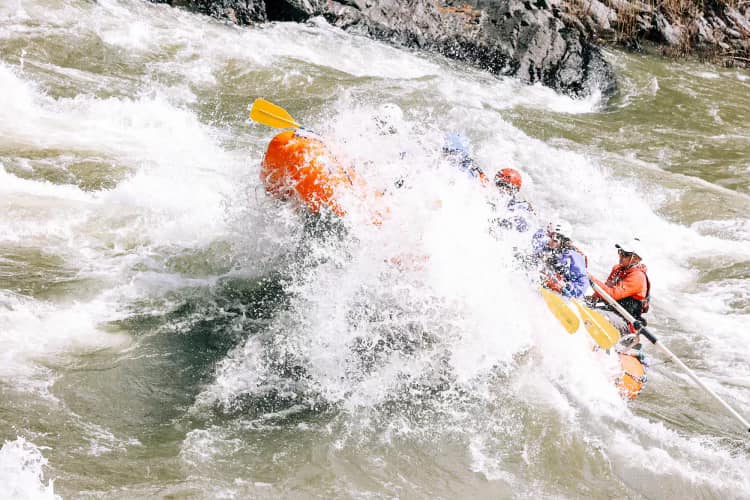
Mile 7.3 – Tumbleweed
Class III / IV. Tumbleweed is usually the largest rapid on the river, depending on flows. At high water, this is not a great place to swim; narrow canyon walls and helical flows make for very chaotic water. Most of the rapid is open above around 12,000 cfs, with a large boils and eddy fences towards the bottom to watch out for. At medium to low flows, the line is left of the large river right rock, squaring up to the eddy fence and wave coming off the left side. Scout from river left.
Mile 7.4 – Surfer Joe
Class II. Great surf spot for kayaks and rafts to play after tumbleweed.
Mile 7.6 – Boat Flipper
Class III. This feature only comes out at high water. Aptly named, this huge wave can easily flip fully loaded paddle boats. Be prepared for a swim and rescue if you opt to run this wave. You can run to the right or left of it, but all of the current pushes you into the wave, so make your decision early.
Mile 7.6 – Zoo Town Surfers Headquarters
River Right. Zoo Town Surfers headquarters can be seen from the huge “dead fish eddy”.
Mile 7.6 – Roller Coaster
Class III. At medium to high flows, this rapid lives up to its name and provides a fantastic wave train left of center. As the water levels drop below 12,000 cfs, the waves start closing out into holes. You can always go left or right of the rocks and holes, but hard right skips everything.
Mile 7.9 – Jump Rock
River Right. A popular rock jump, this is usually quite busy with commercial groups. Just upstream you can find a tiny play wave. Great for learning how to surf in a kayak.
Mile 7.9 – Boat Eater
Class III. Smaller than its bigger brother upstream, this hit should still be given proper respect. Again only out at higher flows, this wave tends to build and crash with irregular timing. You may not get wet at all, or you may be fully stopped or even see a flip.
Mile 8.1 – Fang
Class III. A crowd pleaser to be sure! Generally river right moving center with a great hit at the bottom, at higher flows more options open up. Fantastic play here at medium to low flows.
Mile 8.3 – Mermaid Rock
Class II. An easy to see, large rock sits on river right, run down the center for the small wave train. Fun, rocky play to be had at lower flows.
Mile 8.6 – Riffle
Class II. Small riffle with small waves, rocks and holes throughout. Barely worth mentioning, but at the end of this riffle is a trail leading up to the parking area for the kayak takeout; Ralphs.
Mile 8.9 – Ralph’s Kayak Takeout
River Right. While it is possible to get a raft up this steep staircase and trail, most folks prefer to float down to Tarkio if they are running a raft.
Mile 9.2 – Fish Creek
River Left. Great stop for swimming, lunch, and short hikes. A short walk up the creek will bring you to a beautiful swimming hole. While this is a great spot, it tends to see heavy outfitter use in the Summer months. Also, Fish Creek enters the Clark Fork here.
Mile 9.5 – Pinball Rapid
Class II. The last rapid for the Alberton Gorge. At high water the river is punctuated with large holes. At low water, this is the last real opportunity for Summer splashes. Generally starting river right and working towards the left or staying right after the first large hole.
Mile 9.7 – Sunburn Alley
The long, flat paddle out below pinball is a great space for swimming, relaxing, and enjoying the scenery as you finish the day up.
Mile 12.1 – Tarkio Boat Ramp
River Right. Boat ramp comes up fast at high water, be looking in the reeds and ready to dive into the eddy.
Mile 12.2 – Entrance to Tarkio Gorge
For those that want to extend their float by about 4 miles, you can skip Tarkio Boat Ramp and keep moving down into Tarkio Gorge. While it is beautiful, there is not much whitewater to speak of. Some folks launch from Tarkio to run this peaceful scenic section, but it is highly recommended to avoid doing this as you get past noon, as Tarkio Boat Ramp gets quite hectic. If you do choose to launch here, the same principles as Cyr should be followed. Show up prepared, be quick and efficient.
Mile 14.8 – Guide Surprise
Class II. Towards the end of the Tarkio Gorge is a fun wave or hole that has taken a number of boaters by surprise. Run right moving center to avoid the waves, or stay hard right and square up for a final fun ride. Unless you want some potential clean up, I tend to avoid running this wave below around 4000-5000 cfs.
Mile 16.6 – Highway 90 Bridge
Overpass right before takeout
Mile 17.2 – Forest Grove Takeout
River Right. At higher flows this takeout comes up incredibly quickly and is hidden by the reeds, similar to Tarkio. Stay to the right and be ready to drive into the tiny eddy. If you have a large group, landing at the cobble bar just above the boat ramp is a good idea.